
How to patch a small roof leak before calling a roofer
A small roof leak can sometimes be held temporarily while a roofer is arranged. This guide covers safety, finding the source, and temporary measures, and when to stop and call.
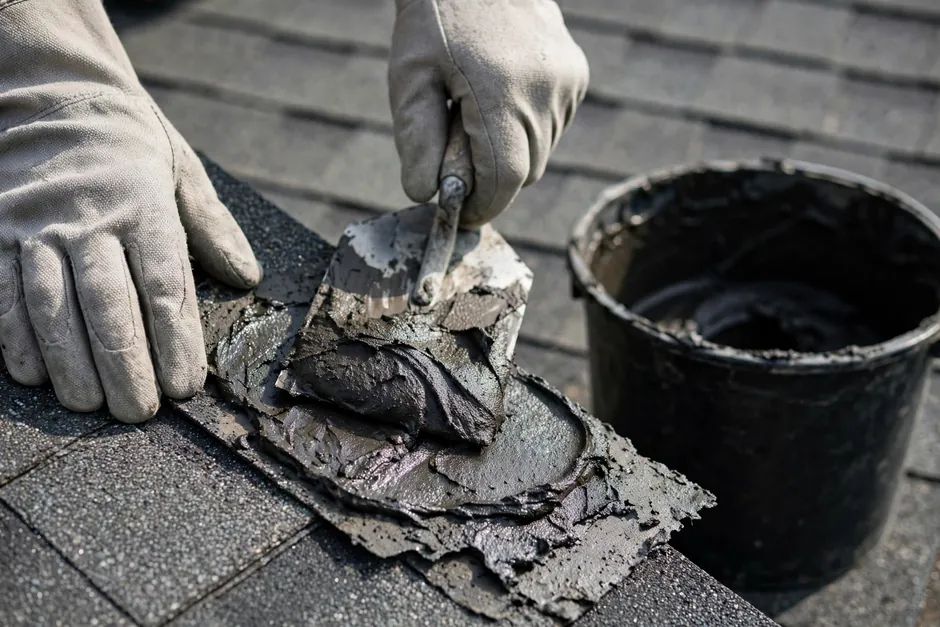
How to patch a small roof leak before calling a roofer starts with safety and with finding the source. A patch is a temporary measure that holds water back while a roofer is arranged. It does not replace repair, and it does not substitute for an inspection. This guide covers what can be done safely from inside and from the ground, what a temporary patch involves, and when to stop and call.
First, find the actual leak source
Water rarely enters directly above the stain it leaves. It travels along decking, rafters, and insulation before showing inside, so the stain marks where water arrived, not where it entered. Finding the source means tracing uphill from the stain, in the attic where access allows, toward the ridge.
Start inside. Note where staining, bubbling paint, or dripping appears, and check the attic above it for damp insulation, staining on the deck, and daylight through the roof. Photograph what you find, with the date noted. The record helps the roofer and any later insurance conversation.
From the ground, look for missing or displaced shingles, damaged flashing at chimneys and walls, and debris in valleys and gutters. Do not climb onto a wet, steep, or damaged roof to look closer. The ground check plus an attic look covers the first pass. If the source is not clear from inside and from the ground, stop there: a roof inspection traces it with the surface, flashing, and attic checked together. See leak detection and repair for how sources are traced professionally, and why water drips from a ceiling after rain for the interior side.
- Stains and drips mark arrival points, not entry points. Trace uphill.
- Attic signs: damp insulation, staining on the deck, daylight through gaps.
- Ground signs: missing shingles, displaced flashing, debris in valleys.
- Flashing joints at chimneys, walls, skylights, and valleys are common entry points.
- Condensation and plumbing leaks can mimic roof leaks. The attic look helps separate them.
What you need for a temporary roof leak patch in South Bend Indiana
A temporary patch uses roofing products made for the purpose, applied according to the manufacturer's guidance. Household sealants and general-purpose adhesives are not roofing products, and this guide does not recommend improvising with them. Follow product guidance on surface conditions and curing.
Work only where it can be done safely: from inside the attic, or from the ground, or on a low, dry, stable surface with secure footing. If the roof is steep, wet, icy, or high, stay off it. Safety governs every step below, and no patch is worth a fall.
- Roofing cement or patching compound made for roofing, used per manufacturer guidance
- Flashing tape or patching membrane compatible with the roofing in place
- Spare shingles matching the roof, where available, for covering a small damaged area
- A covering sheet for temporary protection of an exposed area, secured against wind
- Containers, sheeting, and towels for interior water control while help is arranged
Keep the work temporary in intent and in fact. A patch holds water back for a short period while repair is arranged. It is not a repair, and it should not be left in place as if it were one.
For flashing joints, see chimney flashing repair. Flashing work beyond a temporary cover belongs to a contractor, because the joint must be lapped and sealed as a detail, not smeared over.
Step-by-step: how to patch a small roof leak South Bend IN
The steps below are temporary measures for a small, accessible leak. Each step is framed as holding water back while a roofer is arranged. If any step requires working on a steep, wet, or damaged roof, skip it and call.
- Control water inside first. Place containers under drips, move belongings, and lay sheeting where water is spreading. Avoid areas where a ceiling looks swollen or sagging, and keep electrical safety in mind where water meets fixtures or outlets.
- Find the source from the attic and the ground. Trace uphill from the stain in the attic, and check the ground view for missing shingles and displaced flashing. Photograph findings with the date noted.
- Clear debris where it can be reached safely. Leaves and debris in valleys and gutters hold water at joints. Clear what can be reached from the ground or a secure position, and no more.
- Apply a temporary cover to the entry area. Where the entry area is accessible and safe to reach, apply roofing cement and flashing tape, or a covering sheet, per manufacturer guidance. Keep the cover temporary and note where it was placed.
- Check the patch after the next rain. Note whether dripping continues, and photograph any change. A patch that does not hold shows the source was elsewhere or the damage is wider.
- Arrange repair promptly. A temporary patch buys time, not a fix. Arrange a roof repair visit and share the photographs and notes. The roofer traces the source and scopes the repair.
A patch that holds for a short period is still temporary. The entry point, the flashing or shingle detail behind it, and the deck condition all need a professional look before the patch is relied on.
See leak detection and repair for the professional side, and why a roof leaks around the chimney where the leak is at a chimney joint.
What affects the cost of a roof leak patch in South Bend Indiana?
No prices are stated in this guide. What affects the cost of addressing a leak, patch and repair together, is scope: how much of the roof is involved, where the entry point is, and whether flashing or decking is affected.
A temporary patch and a repair are different scopes. The patch holds water back briefly. The repair addresses the entry point, the flashing or shingle detail, and any deck damage. Comparing the two on price alone misleads, because only the repair resolves the cause.
- Extent of the entry area. A single joint against damage spread across a slope.
- Location and access. Chimney, valley, and penetration joints differ in access and detailing from open field areas.
- Flashing involvement. Whether flashing must be reworked as a detail, or the issue is covering alone.
- Follow-up repair scope. What the inspection finds beyond the patch: deck condition, ventilation, and adjacent joints.
A written scope for the repair, following an inspection, is the way to compare. This site publishes no prices, and no South Bend leak-repair price dataset exists for this guide.
Common mistakes to avoid when patching a roof leak
The most common mistake is patching the ceiling stain instead of the roof. Paint and filler hide the symptom. They do not stop the water, and they make the next inspection harder.
Other mistakes to avoid:
- Sealing over a wet or dirty surface. Follow product guidance on surface conditions. A patch applied against guidance is unlikely to hold.
- Using products not made for roofing. Household sealants are not roofing products. Use roofing products made for the purpose, per manufacturer guidance.
- Walking on a cold, wet, or steep roof. Fall risk and surface damage both rise sharply. If the roof cannot be reached safely, stay off it and call.
- Treating condensation as a leak. If the attic shows condensation or frost on the underside of the deck, the issue may be ventilation and air movement rather than a roof entry point. An inspection separates the two.